comments 4

Kale Salad with Pickled Carrots, Pistachios, and Pecorino Romano

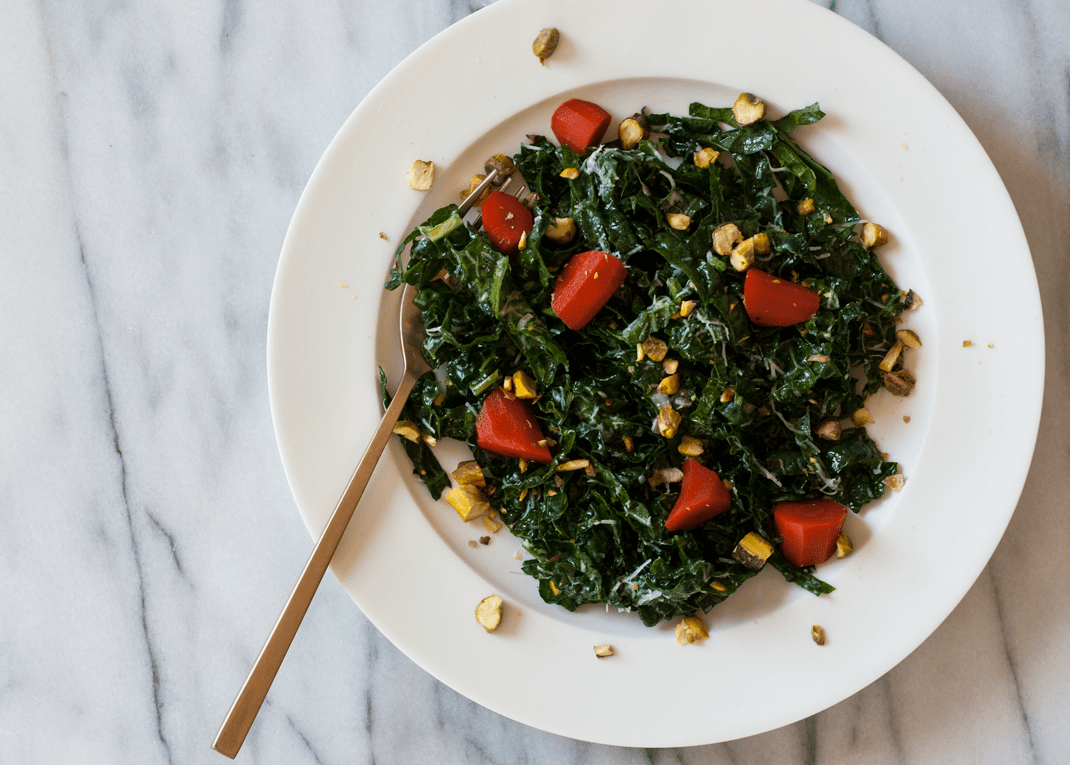
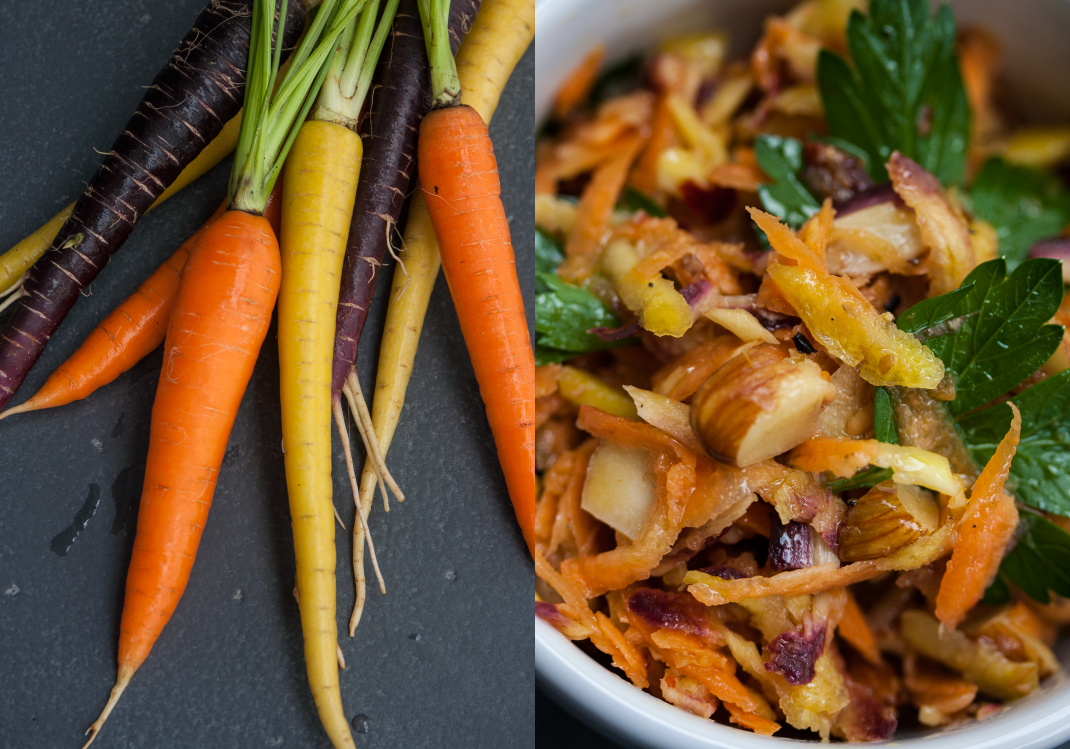
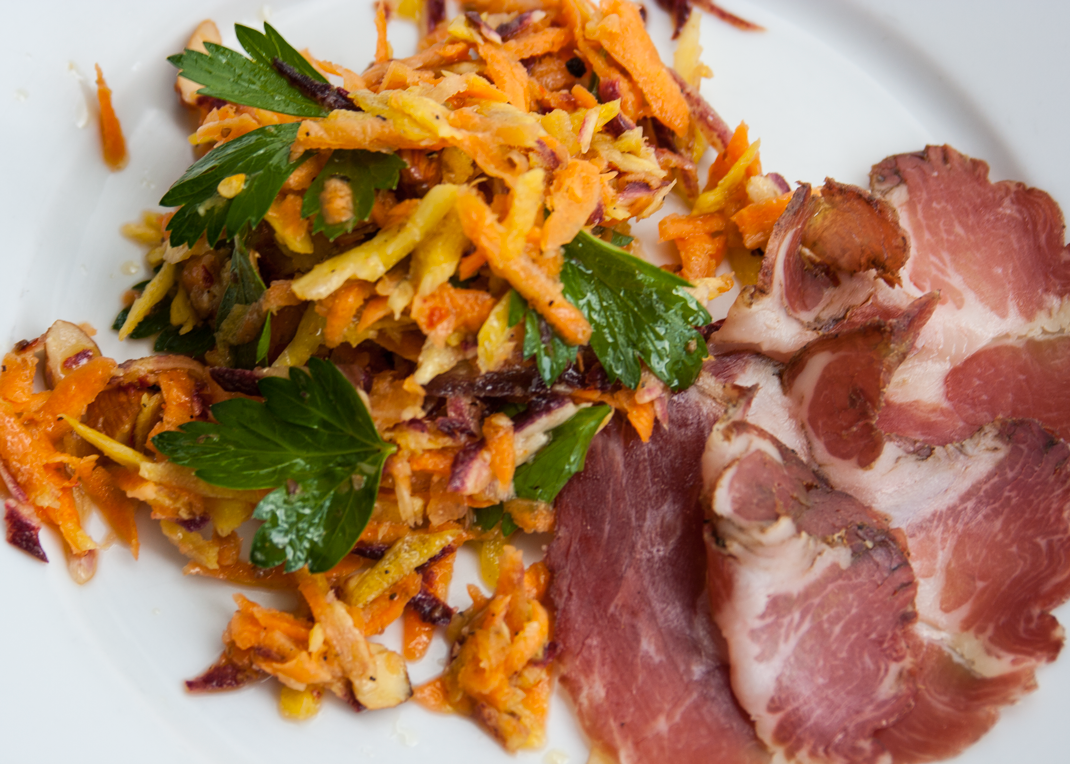
My daughter and I visited family in Charlottesville, Virginia last weekend. After a fun-filled trip to the farmers market with my nieces and nephew on Saturday morning, my sister-in-law prepared a delicious kale salad with local Manchego cheese for lunch. Inspired by her salad, I decided to create a recipe for kale salad with ingredients from my pantry. The abundance of carrots in the market led me to pickle several jars of orange and red carrots over the last few weeks. I combined the kale with a few of the red carrots, pistachios and Pecorino Romano; a delicious combination of hot, salty, sweet, sour, and crunchy.

Kale Salad with Pickled Carrots, Pistachios, and Pecorino Romano

Serves 4

Salad

  • 1 tablespoon champagne vinegar
  • 2 tablespoons red onion, finely chopped
  • 1 teaspoon honey
  • ½ teaspoon kosher salt
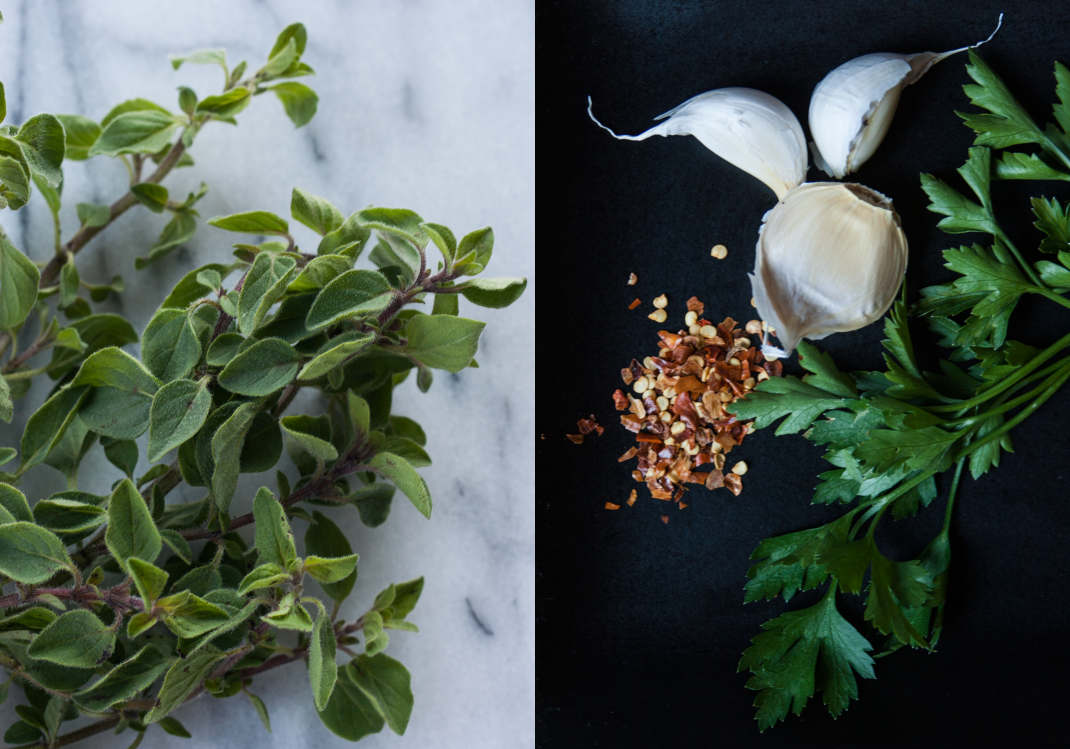
  • ¼ teaspoon red chili flakes
  • 2 tablespoons extra-virgin olive oil
  • 2 bunches lacinato kale, stems removed, leaves thinly chopped
  • ½ cup pickled carrots*
  • ¼ cup pistachios, shelled and toasted
  • ¼ cup Pecorino Romano cheese, finely grated

Combine vinegar, red onion, honey, salt, and red chili flakes in a small bowl and allow to sit for 10-15 minutes. Add the olive oil to the bowl and whisk to combine. In a large bowl, combine kale with the vinaigrette and massage gently with your hands. Allow the kale salad to marinate for at least 20 minutes prior to serving. Before serving add pickled carrots, pistachios, and cheese and toss to combine.

* Raw or roasted carrots can be substituted for the pickled carrots

Pickled Carrots

(adapted slightly from The Preservation Kitchen by Paul Virant)

3 pints

  • 2 cups water
  • 1 cup plus 2 tablespoons champagne vinegar
  • ¼ cup sugar
  • 1 ½ tablespoons kosher salt
  • 1 teaspoon coriander seeds
  • 1 teaspoon fennel seeds
  • ½ teaspoon black peppercorns
  • 1 teaspoon red chili flakes
  • 6 cups carrots. bias cut (1 ½-2 pounds carrots)

In a sauce pan, prepare the brine by combining the water, vinegar, sugar, and salt and bringing to a boil. Once the sugar has dissolved, decrease the heat to low keeping the brine hot while preparing the other ingredients.

Add the coriander seeds, fennel seeds, black peppercorns, and red chili flakes to a small sauté pan and toast over medium heat for 1-2 minutes until fragrant. Set aside.

Sterilize the pint jars in a canner or a large pot fitted with a rack. Fill the canner with water to cover the jars and bring to a boil. At the same time, place the lids in a small saucepan, cover with water, and bring the lids to a simmer. The simmering water will soften the seal on the lids. Remove the jars and lids from the boiling water just prior to filling and place them on a clean towel.

Divide the toasted spices equally and spoon into the bottom of the jars.

Blanch the carrots for 1 minute in a pot of boiling, salted water. Pack blanched carrots into the jars. Pour the brine over the carrots leaving ½ inch of room at the top. Tap the jars gently to eliminate air pockets around the carrots. Add more brine to return the headspace to ½ inch. Wipe the rims with a clean, damp towel and screw on lids taking care to ensure they are snug but not tight.*

Place the filled jars back in the canner and add enough water to cover the top of the jars by 1 inch. Bring water back to a boil and process for 10 minutes. The processing time should begin once the water reaches a boil. After 10 minutes remove the jars and allow to cool on a wire rack.

The recipe can be doubled if you wish to preserve a larger quantity of carrots.

* If you prefer not to process the pickled carrots, simply place the lids on the jars, allow to cool to room temperature, and refrigerate. Pickled carrots will keep for at least a week in the refrigerator.


kaleandsalad

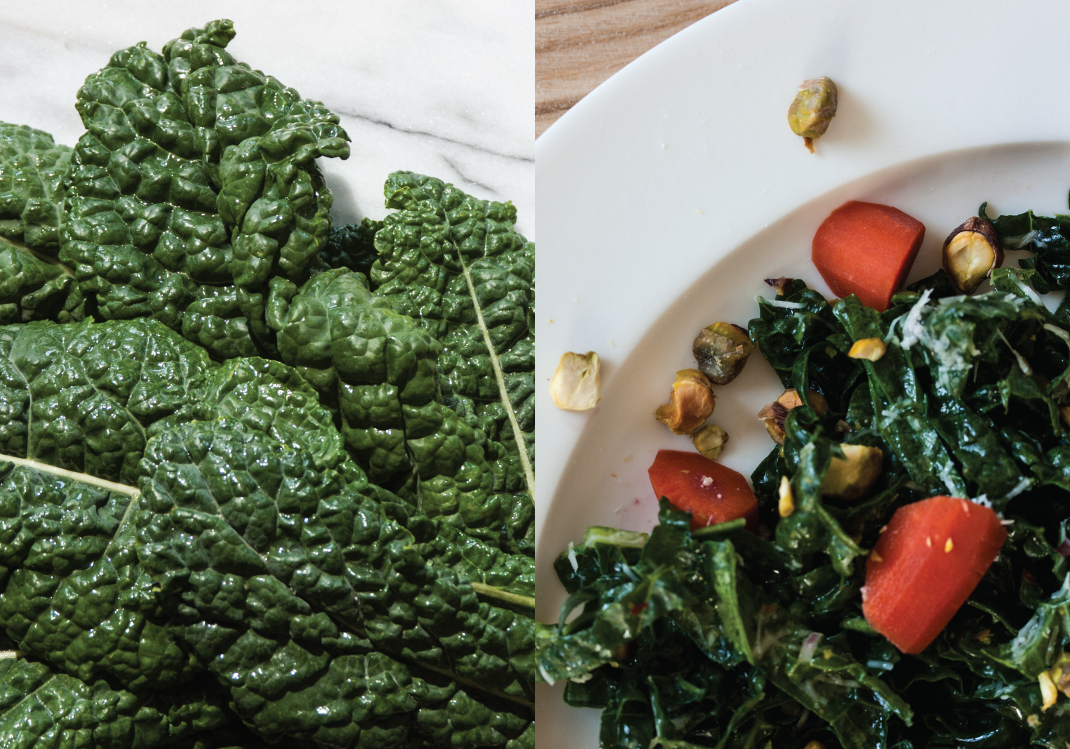
Lacinato Kale | Kale Salad

pickledorangeredcarrots

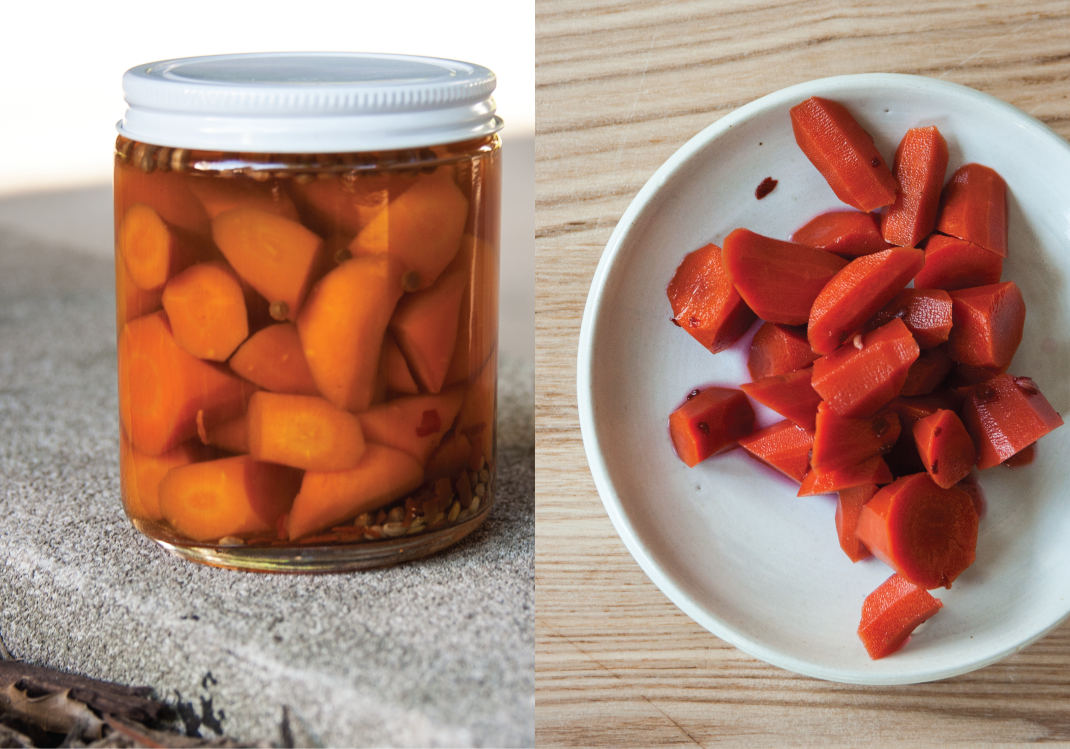
Jar of Pickled Orange Carrots | Pickled Red Carrots with Coriander and Red Chili Flake

m[orange]

comments 6

Charred Cauliflower with Toasted Breadcrumbs, Cornichons, and Parsley

I LOVE cauliflower. In fact, I serve cauliflower so often that my daughter protests. Anyway, I found perfect cauliflower at the Green City Market this week and I cannot resist posting another recipe from The Purple Pig.

Charred Cauliflower with Toasted Breadcrumbs, Cornichons, and Parsley

(adapted from Charred Cauliflower with Cornichons by Jimmy Bannos Jr.)

Serves 2-4

  • 1 head of cauliflower, cored and chopped into 1 inch florets
  • ¼ cup extra-virgin olive oil
  • 2 ½ ounces fresh bread crumbs*
  • ¼ cup cornichons, thinly sliced
  • ½ cup flat leaf parsley, finely chopped
  • 1 tablespoon of lemon juice
  • kosher salt
  • black pepper, freshly ground

In a small sauté pan, heat 1 tablespoon of the olive oil over medium heat and toast the bread crumbs with salt and pepper to taste until golden, approximately 4-5 minutes. Allow the bread crumbs to cool and crisp on a plate.

Preheat a large sauté pan over medium-high heat. Toss the cauliflower with 1 ½ tablespoons of the olive oil and add to the pan. Char the florets, turning often, until the cauliflower is slightly tender and blackened in spots, approximately 8-10 minutes. Pour the charred florets into a large serving bowl.

Add the cornichons, parsley, lemon juice, and 1 ½ tablespoons of the olive oil to the bowl with the cauliflower and toss gently to combine. Season with salt and pepper and garnish with toasted bread crumbs.

* I remove the crust from day old bread, pulse it in the food processor to create coarse bread crumbs, and freeze for use in recipes.


cauliflower

Locally Grown Head of Cauliflower

charredcauliflowerpurplepig


comment 0

Summer Corn and Heirloom Cherry Tomato Salad with Arugula Pesto

Currently, there is an abundance of fresh, local corn at the market. What better way to celebrate this bounty than with a recipe adapted from one of my favorite Chicago restaurants The Purple Pig. Jimmy Bannos Jr. is the chef/owner as well as the recipient of the James Beard Foundation 2014 Rising Star Chef of the Year Award. I enjoyed lunch at The Purple Pig twice in the last month. The extensive menu consisting of small plates of Mediteranean inspired cuisine is creative, delicious, and intended to be shared. Some of my favorite small plates include:

Pork Fried Almonds with Rosemary and Garlic | Raw Corn with Heirloom Tomatoes and Arugula Pesto | Charred Cauliflower, Toasted Breadcrumbs, Cornichons, and Parsley | Taramosalata | Eggplant Caponata with Goat Cheese | Octopus with Green Beans, Fingerling Potatoes, and Salsa Verde.

Summer Corn and Heirloom Cherry Tomato Salad with Arugula Pesto

(adapted from Raw Corn with Heirloom Tomatoes and Arugula Pesto by Jimmy Bannos Jr.)

Serves 2-4

  • 1 cup extra-virgin olive oil
  • 1 ¼ cups arugula, finely chopped
  • ¼ cup flat leaf parsley, finely chopped
  • ½ cup parmesan cheese, freshly grated
  • 2 cups corn, cleaned and cut off the cob
  • 1 cup cherry tomatoes, halved
  • kosher salt
  • black pepper, freshly ground

To make the arugula pesto, combine the olive oil, arugula, parsley, and ¼ cup of the parmesan cheese in a small bowl. Season with salt and pepper to taste.

In a separate bowl, combine corn, cherry tomatoes, 1 cup of the arugula pesto, ¼ cup of the parmesan cheese, and lemon juice and stir to mix. Taste the salad and add salt and pepper as needed. The additional arugula pesto can be used to garnish the salad or saved for another recipe.

corn

Summer Corn

cherrytomatoarugulapesto

Heirloom Cherry Tomatoes | Arugula Pesto

comments 4

Gravlax

When I lived in Portland, I was lucky to eat salmon fresh from the Columbia River. Many of my friends who live in Oregon love fishing, and I was grateful to eat salmon often during the fishing season.

Earlier this week, I purchased a wild sockeye salmon from the local fish market. Sockeye salmon has beautiful firm flesh that is dark orange-red. The fishing season for sockeye salmon is during the summer months in Alaska, Oregon, and Washington. Most sockeye salmon available at fish markets weigh between three and six pounds. The whole salmon I purchased to prepare gravlax weighed approximately five pounds prior to being filleted. The fishmonger filleted the salmon, scaled the skin, and removed the pin bones for me.

Gravlax

(adapted from Simply Salmon by James Peterson)

Makes 2 fillets of cured salmon

  • 1 whole salmon, filleted, scaled, and pin bones removed
  • 1 cup sugar
  • 1 cup coarse sea salt
  • 1 bunch of dill

Prepare 3 layers of aluminum foil approximately 3 times the width and 2 times the length of one of the salmon fillets.

Combine the sugar and salt in a small bowl. Spread ½ cup of the mixture on the prepared aluminum foil and place one of the salmon fillets skin side down on the mixture. The entire skin should be in contact with the sugar and salt mixture. Spread ½ cup of the mixture on the flesh of the salmon. Place the dill on the salmon covering the entire surface. Spread another ½ cup of the sugar and salt mixture on top of the dill. Cover with the second salmon fillet. Rub the skin side of the second fillet with the remaining ½ cup of the mixture and wrap the entire salmon tightly with the aluminum foil.

Place the wrapped salmon on a rimmed baking pan. Set an additional baking pan on top of the salmon and weight the pan with several cans or sauce pans. Store the salmon in the refrigerator for 48 hours to allow it to cure. During the curing time remove the weights and turn the salmon every 12 hours. Some liquid may accumulate on the bottom of the baking pan as the salmon cures. Replace the weights on the salmon and continue to cure for the allotted time.

After the salmon has cured for 48 hours, unwrap the fish and rinse briefly to remove the sugar, salt, and dill. Dry the gravlax. Remove the skin from the salmon and slice thinly. Gravlax will keep refrigerated for 3 days and frozen for 3 months.


Wild Sockeye Salmon | Wild Sockeye Salmon Curing with Sugar, Sea Salt, and Dill

Wild Sockeye Salmon | Wild Sockeye Salmon Curing with Sugar, Sea Salt, and Dill

Sliced gravlax can be served with fresh goat cheese and black pepper on toasted bread, with cream cheese and cucumbers on a bagel, or with scrambled eggs. I chopped the pieces of gravlax that were too small to slice and prepared a simple tartar by adding capers, minced red onion, and black pepper. The tartar is delicious served with lemon and crackers.

Gravlax, Fresh Goat Cheese, and Black Pepper on Toasted Bread | Gravlax Tartar

Gravlax, Fresh Goat Cheese, and Black Pepper on Toasted Bread | Gravlax Tartar


comment 0

Buvette: a Gastrothèque and a Cookbook

Buvette is a lovely restaurant located on a tree-lined street just steps from the boutiques on Bleecker Street in the West Village. My husband and I enjoyed a late lunch at Buvette in July while vacationing in New York. The gastrothèque is open all day; it serves food and drinks to locals and visitors for breakfast, lunch, and dinner. As we walked toward the entrance, I noted the relaxed, neighborhood atmosphere of the restaurant. We were seated in the front room at a petite table across from the bar. Our lunch began with champagne served in the perfect diminutive coupe glasses followed by carottes râpées (julienned carrots with pistachios and lemon), poulpes aux olives (octopus salad with celery and olives), and les oeufs brouillés (steamed eggs on toast with smoked salmon and caper berries). The carottes râpées were served on a plate set on a small silver pedestal to allow room for all of our plates on the petite table. Our lunch was as relaxing as it was delicious, and we finished with espresso.

buvettebicycle

Bicycle in front of Buvette

I discovered the cookbook entitled Buvette: the Pleasure of Good Food by Jody Williams in May. Her recipes are simple, straightforward, and delicious. The cookbook is intended to inspire cooks to recreate her recipes at home with ease. I have made Marinated Olives with Orange Zest and Red Chili, Salmon Rillettes with Horseradish, and Roast Chicken Salad and Haricots Verts with Mustard Vinaigrette, as well as the refreshing carottes râpées we tasted at the gastrothèque. I substituted almonds for the pistachios, and flat-leaf parsley for the cilantro in the original recipe. At home, I served the carottes râpées with coppa.

Carrots with Almonds and Coriander Vinaigrette

(adapted from Buvette: the Pleasure of Good Food by Jody Williams)

Serves 3-4

  • 1 tablespoon lemon juice
  • 3 tablespoons extra-virgin olive oil
  • ½ teaspoon kosher salt
  • ½ teaspoon red chili flakes
  • ¾ teaspoon coriander seeds, toasted
  • 1 pound carrots, peeled and coarsely grated or julienned
  • ¼ cup almonds, toasted
  • ¼ cup flat-leaf parsley leaves

Crush coriander seeds in a mortar and pestle. Add lemon juice, olive oil, salt, and chili flakes to the mortar and pestle and whisk to combine. In a large bowl, combine carrots, almonds, and parsley with the coriander vinaigrette and toss gently to mix. Allow the carrot salad to sit for at least 30 minutes prior to serving to allow the flavors to blend. This salad will keep for a few days in the refrigerator.


rainbowcarrotsandsalad

Rainbow Carrots and Carrots with Almonds and Coriander Vinaigrette

carrotsaladcoppa

Carrots with Almonds and Coriander Vinaigrette and Coppa


comment 0

Chimichurri

My husband and I spent a weekend in July relaxing by Lake Michigan at the summer home of a friend in Saugatuck. The weekend offered the chance to reconnect with friends, walk on the beach, and eat delicious meals. On Saturday evening, we prepared a simple dinner of heirloom tomatoes with balsamic glaze, a salad of red and green leaf lettuces with pine nuts, goat cheese in olive oil, and grilled bone-in ribeye with chimichurri. This recipe for chimichurri is a standard in my house whenever we are serving grilled lamb or beef. It is a recipe I have shared often with friends.

Chimichurri

(adapted from Francis Mallmann’s Seven Fires: Grilling the Argentine Way)

Makes approximately 1¾ cups

  • 1 cup flat-leaf parsley leaves
  • 1 cup oregano leaves
  • 2-3 cloves of garlic, or more to taste
  • 2 teaspoons red chili flakes
  • ¼ cup red wine vinegar
  • ½ cup extra virgin olive oil
  • ½ cup water
  • 2 teaspoons kosher salt

In a small saucepans, dissolve 2 teaspoons kosher salt in ½ cup boiling water. Remove from heat and allow the salted water to cool. Combine the chili flakes, vinegar, and olive oil in a 16 ounce jar and whisk to combine. Mince the garlic and add it to the jar. Chop the parsley and oregano and add it to the jar along with the cooled salted water.  Place the lid on the jar and shake to combine. Prepare the chimichurri several hours prior to serving to allow the flavors to blend. The chimichurri will keep for 2-3 weeks in the refrigerator.

chimichurriingredients

Oregano, parsley, garlic, and red chili flakes

comments 2

Goat Cheese in Olive Oil

Preserving goat cheese in extra-virgin olive oil with peppercorns, thyme, and lemon zest enhances the flavor. The combination of herbs, spices, and aromatics can be varied according to taste and availability; you can substitute oregano for the thyme or orange zest for the lemon zest. Although I chose a goat cheese with a white, chalky rind from France named St. Maure Caprifeuille for this recipe, a fresh domestic goat cheese from Vermont Creamery, Coach Farm, or Laura Chenel would be delicious.

Goat cheese preserved in olive oil is a wonderful addition to a summer salad of heirloom tomatoes and red leaf lettuce dressed with White Wine Vinaigrette. It is also perfect served as an appetizer with artisan bread or crackers.

Goat Cheese in Olive Oil

(adapted from Diana Henry’s Salt Sugar Smoke)

Fills a 1 pint jar

  • 9 – 11 ounce goat cheese log
  • 1 tablespoon black peppercorns, lightly crushed
  • 1 tablespoon fresh thyme leaves
  • 1 teaspoon red chili flakes
  • 1 lemon, finely zested
  • 1 – 1 ½ cups extra-virgin olive oil

Cut the goat cheese into ¼ inch rounds . Layer the rounds in a sterilized pint jar* with the peppercorns, thyme, red chili, lemon zest, and olive oil. The goat cheese should be completely covered by the olive oil. Place the covered jar in the refrigerator and allow the cheese to marinate for at least one day. Remove the cheese from the refrigerator and bring to room temperature before serving. The cheese will keep refrigerated for two weeks.

*Sterilize jar by placing in a pot of boiling water to cover for 15 minutes. Allow to cool slightly and dry prior to filling with the goat cheese.


stmaurethyme

Thyme and St. Maure Caprifeuille

comments 2

Black Raspberry Olive Oil Cake

I have been making Lemon Olive Oil Cake since the recipe originally appeared in Gourmet in April 2006. When the black raspberries appeared at the farmers market this week, I could not resist the temptation to add them to one of my favorite cakes. It is best to use a fruity extra-virgin olive oil for this recipe. I made the cake with Organic Extra-Virgin Olive Oil from OMED.

Black Raspberry Olive Oil Cake

(adapted from Gourmet)

Makes 8 servings

  • ¾ cup extra-virgin olive oil, plus additional for preparing the pan
  • 1 lemon
  • 1 cup cake flour, plus 1 tablespoon flour for black raspberries
  • 5 large eggs, separated (reserve 1 egg white for another use)
  • ¾ cup sugar, plus 2 tablespoons sugar for sprinkling the top of the cake
  • ½ teaspoon kosher salt
  • 1 pint black raspberries

Preheat oven to 350℉.

Grease a 9-inch springform pan with a small amount of olive oil. Line the bottom of the pan with a round of parchment paper. Oil the parchment paper with additional olive oil.

Combine 1 cup of flour with the finely grated zest of the lemon in a small bowl. Halve and juice the lemon to yield 1 ½ tablespoons lemon juice and set aside.

Toss the black raspberries with 1 tablespoon of flour in a small bowl and set aside.

In a large bowl, beat together the egg yolks and ½ cup of sugar with an electric mixer on high speed for 3 minutes until the mixture is thick and pale yellow. Reduce the speed to medium. Add ¾ cup of olive oil and the lemon juice. Turn off the mixer and stir in the flour with a spoon until just combined.

In another bowl, beat 4 egg whites and ½ teaspoon salt with an electric mixer on medium speed until frothy. Slowly add ¼ cup sugar and continue to beat for 3 minutes until the egg whites hold soft peaks.

Fold ⅓ of the egg white mixture into the yolk mixture to lighten the batter. Fold in the remaining egg white mixture and the black raspberries until just combined.

Pour the batter into the prepared springform pan. Tap the pan gently on the counter two to three times to release air from the batter. Sprinkle the top of the cake with 2 tablespoons of sugar. Bake for 40-45 minutes. Cool the cake in the springform pan for 10 minutes on a wire rack. After 10 minutes remove the side of the springform pan and allow the cake to continue to cool to room temperature. When the cake has cooled completely, remove the bottom of the pan and the parchment paper before placing on a serving plate.


oliveoilcakeandblackraspberries[1]

Black Raspberry Olive Oil Cake and Fresh Black Raspberries

comment 0

Fresh Cheese, Homemade Strawberry Jam, and Sourdough Miche

I love to make homemade strawberry jam each summer when the first strawberries arrive at the farmers market. This summer I combined the homemade strawberry jam with fresh cheese and artisan sourdough miche for a lovely summer breakfast. Although delicious fresh cheeses like Prairie Fruits Farm Farmstead Goat Cheese are available for purchase at my local cheese shop Pastoral, I decided to make one at home.

Fresh Cheese

(adapted from Nancy Silverton’s recipe for D.I.Y. “Ricotta” in Bon Appétit)

Makes 1 cup

  • 4 cups whole milk, cow or goat
  • 1 teaspoon kosher salt
  • 3-4 tablespoons lemon juice, freshly squeezed

Add the milk to a saucepan and heat to 185 degrees. Remove the saucepan from heat. Add the salt and 3 tablespoons of lemon juice to the warmed milk. Stir gently to combine without breaking the curds. Allow the curds to separate from the whey by letting the mixture stand at room temperature for 15 minutes. Check the mixture to see if curds have formed. If you do not have many curds, add another tablespoon of lemon juice and stir to combine. Allow the mixture to stand for an additional 5 minutes. At this point, use a skimmer or spoon to transfer the curds into a cheesecloth-lined sieve over a large bowl. The cheese will thicken as it drains. Store the cheese in the refrigerator for 1-2 days.


freshcheesestrawberryjam

Fresh cheese and homemade strawberry jam

pqmbread

Sourdough Miche from Publican Quality Meats

comment 0

Phases of the Moon Tea Set

One of my favorite objects in my home is this Phases of the Moon Tea Set. It is a collaboration between Dosa and Heath Ceramics celebrating a shared love of handmade objects crafted from time-honored traditions. Christina Kim of Dosa found inspiration for the tea set in the Heath Ceramics tea cups originally designed by Edith Heath. This limited edition tea set was created from the classic stoneware made famous by Heath Ceramics in light and dark glazes to represent the phases of the moon as seen during the day and night.

In the month following the release of this collaboration, I discovered a selection of prototype tea cups for the Phases of the Moon Tea Set at a design store named OK. I purchased two of the prototypes and I regret not purchasing more. The prototype tea cups reveal part of the process of selecting the perfect shape, color, and glaze for the final collaboration.

On occasion, I have seen prototypes and test pottery from Heath Ceramics available for purchase. Although these pieces of pottery are imperfect in shape, color, and glaze, their imperfections make them beautiful.

dosaprototype

Unfortunately, the the Phases of the Moon Tea Set is no longer available. A good substitute is the Large Modern Cup in Linen by Heath Ceramics; this is one of the shapes that inspired Christina Kim to create the tea cups for this collaboration.